Persoh - Personal Portfolio WordPress Theme
By: ThemesTrace
Support: themestracehelp@gmail.com
Created: Septemebr 26, 2018
Last Update: October 20, 2018
Welcome to Persoh - Personal Portfolio WordPress Theme
Introduction
Thank you for purchasing Persoh WordPress Theme. Before you get started with Persoh theme, please be sure to always check out this documentation. We tried to put all kinds of information related to Persoh theme here and provide you with all the details you need know to use Persoh Theme.
Although, If you are unable to find your answer here in the documentation, please contact us on our mail or directly from our ThemeForest account.
What is included in the packed?
a) Persoh WordPress Themeb) Persoh Child Theme
c) Theme Documentation
d) Necessary Plugins
Others support with Persoh
a) Future / Lifetime Free Updatesb) Support
If you like our theme, Please rate Persoh with 5-star rating with your valuable review. Your review is our asset!
Theme Installation
Before you get started, unzip the main file. You need to upload persoh.zip file otherwise you may get missing style.css error.
There are 2 ways to get started:
1) WordPress Upload:
- Login to WordPress Admin Panel
- Navigate to Appearance > Themes > Add New > Upload Theme
- Click Browse/Choose File ( depending on your browser ), select "persoh.zip" and click Install Now
- After successfully installation clicks on Activate or just move forward to Appearance > Themes and click on Activate to activate the newly installed theme.
2) FTP Upload:
- Log into your web server with FTP client software
- Navigate to /wp-content/themes folder
- Upload the persoh theme folder
- After successfully upload go to Appearance > Themes and click on Activate to activate the newly uploaded theme.
Theme Requirements
To use persoh theme you must be running WordPress 4.6 or higher. If you use hosting with limited resources, you may experience issues with one-click dummy data installation feature.
We recommend you to contact your web hosting service provider to make sure that your server PHP configuration limits are as follows:
- max_execution_time 600
- memory_limit (up to) 256M or 512M
- post_max_size 64M
- upload_max_filesize 64M
If you are running unmanaged dedicated server or VPS, you should check your php.ini file. Otherwise, you can edit .htaccess file in the root of your website and add the following values:
php_value max_execution_time 600
php_value memory_limit 512M
php_value post_max_size 64M
php_value upload_max_filesize 64M
Plugins Installation
After successfully install the "Persoh" theme, you will find a notice to install all the necessary plugins. Here are some steps to install plugins
Step 01:

Step 02:

Step 03:
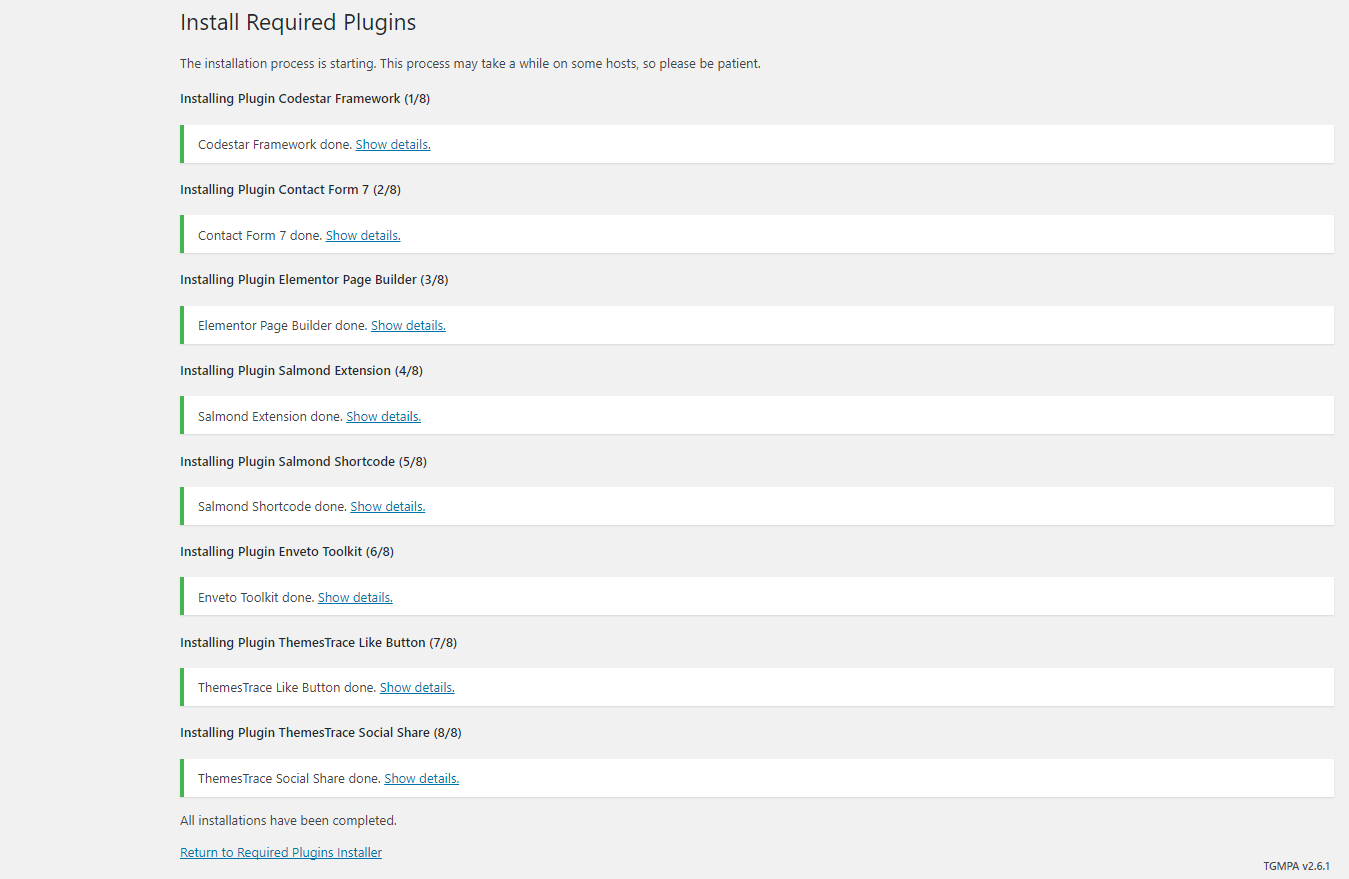
Now Click on Return to Required Plugins Installer
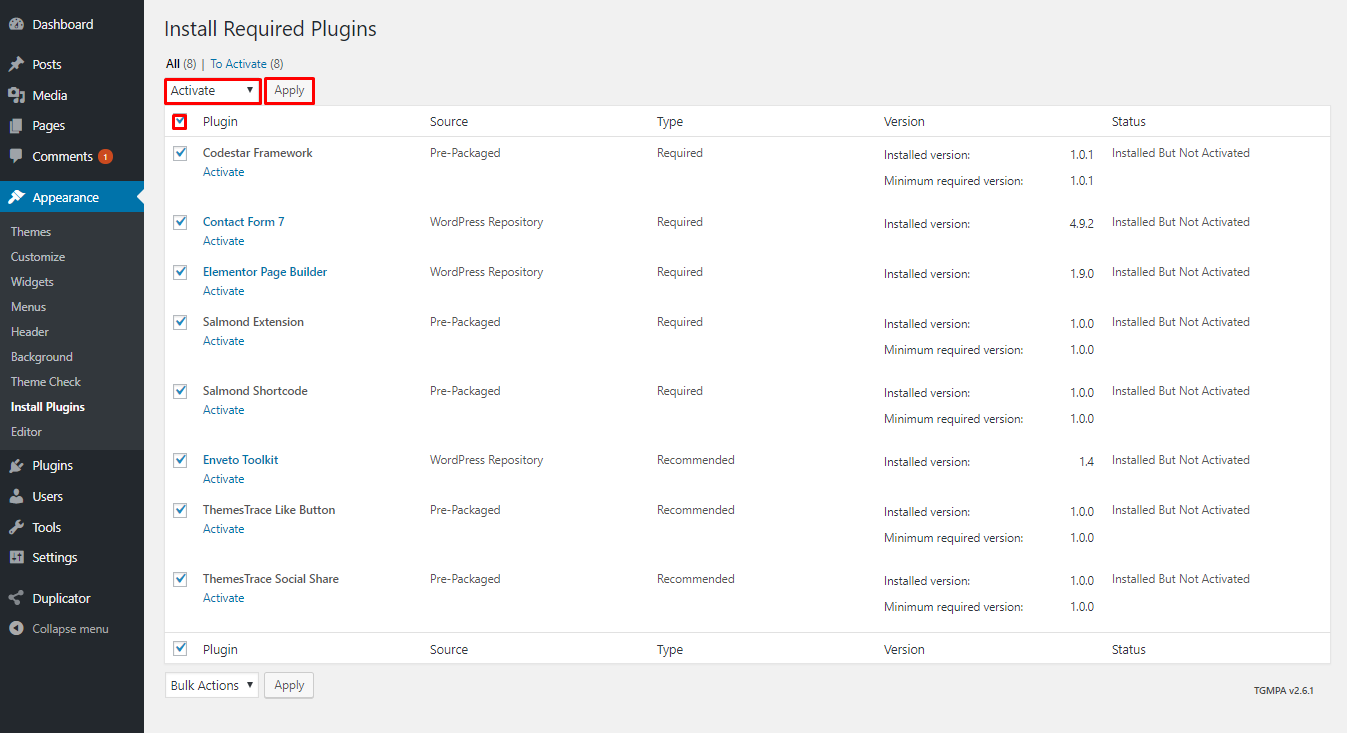
Step 04:
After successfully install all the plugins, you will need to activate them.
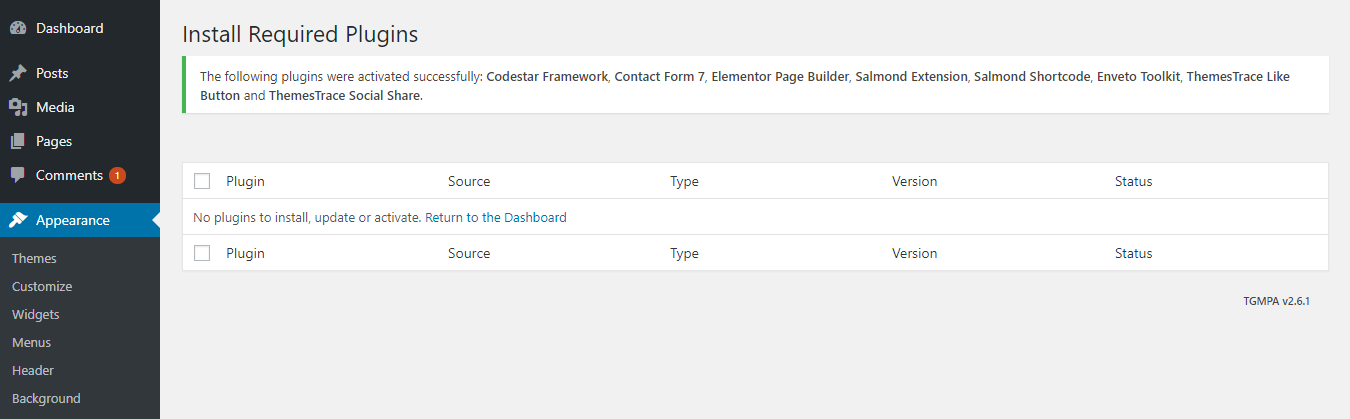
If all the plugins are successfully activated, You will see like the screenshot below
Demo Content Import
After successfully install the "Persoh" theme and Necessary plugins. You will notice an option from Appearance > Import Demo Data. Navigate there to import. Just choose your favorite demo and click on import and wait sometimes. You will find something like this:
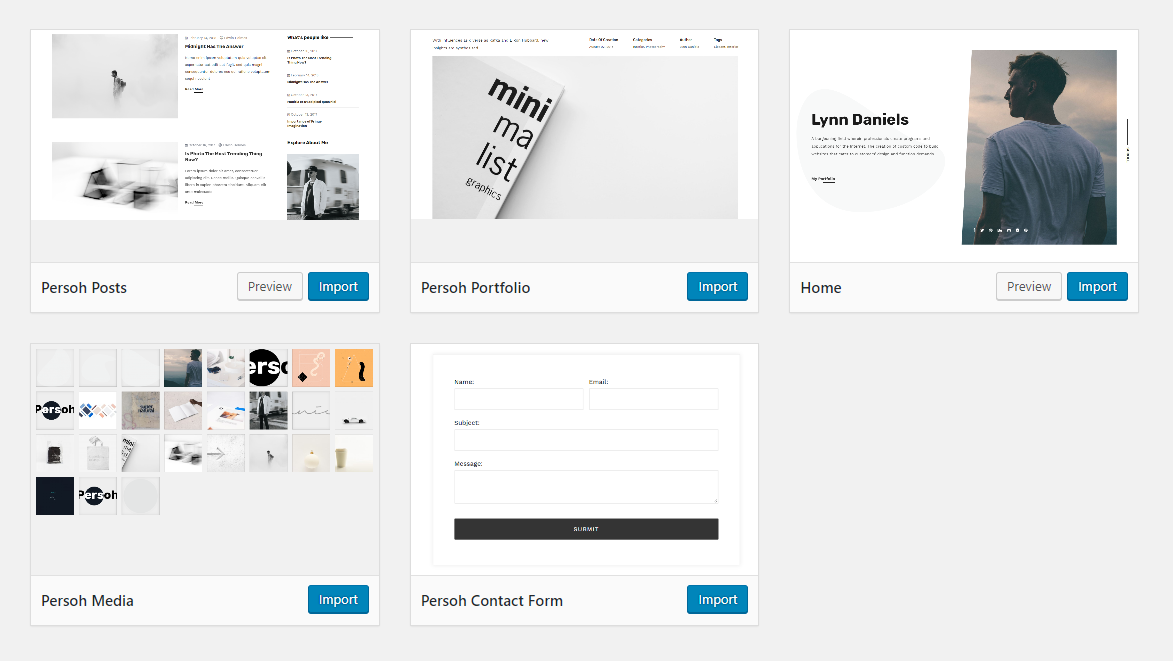
Tips: Blog posts will not show on the imported demo. You need to import blog post separately. Don't be panic! Persoh has the option to import blog post also. Search at very bottom of this page.
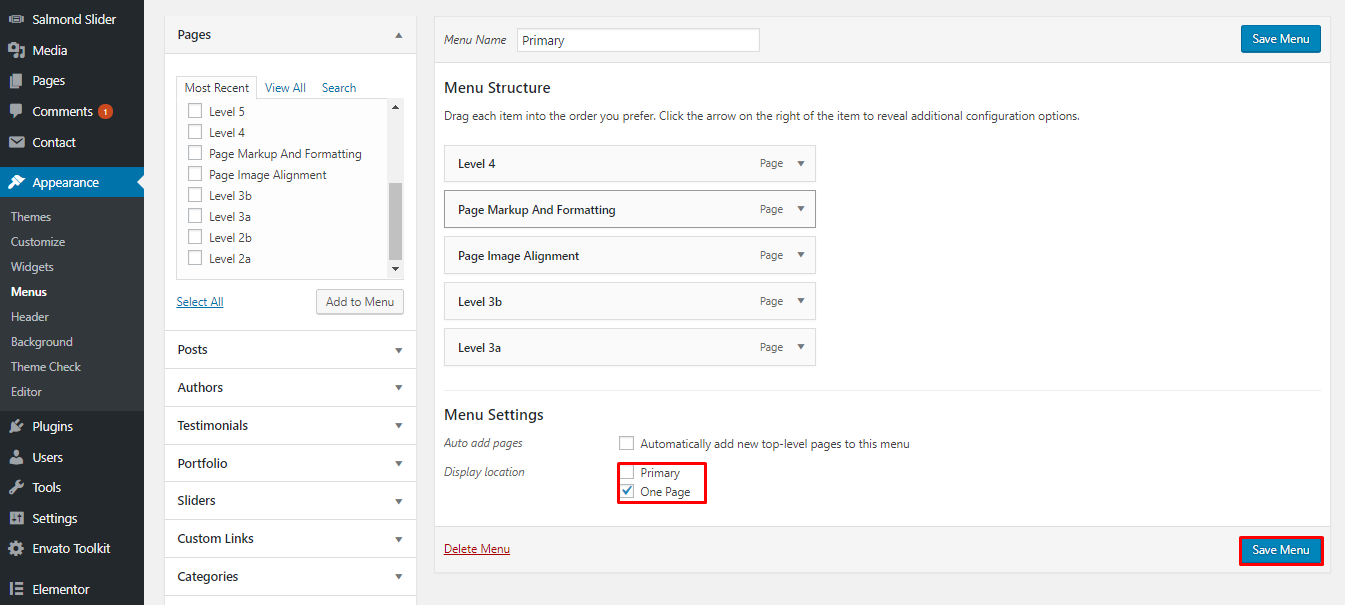
WordPress Navigation
Before you get started to choose the different type of header you need to persoh a navigation menu from WordPress Dashboard. To persoh menu move forward to Appearance > Menus
Step 01:
Create a menu
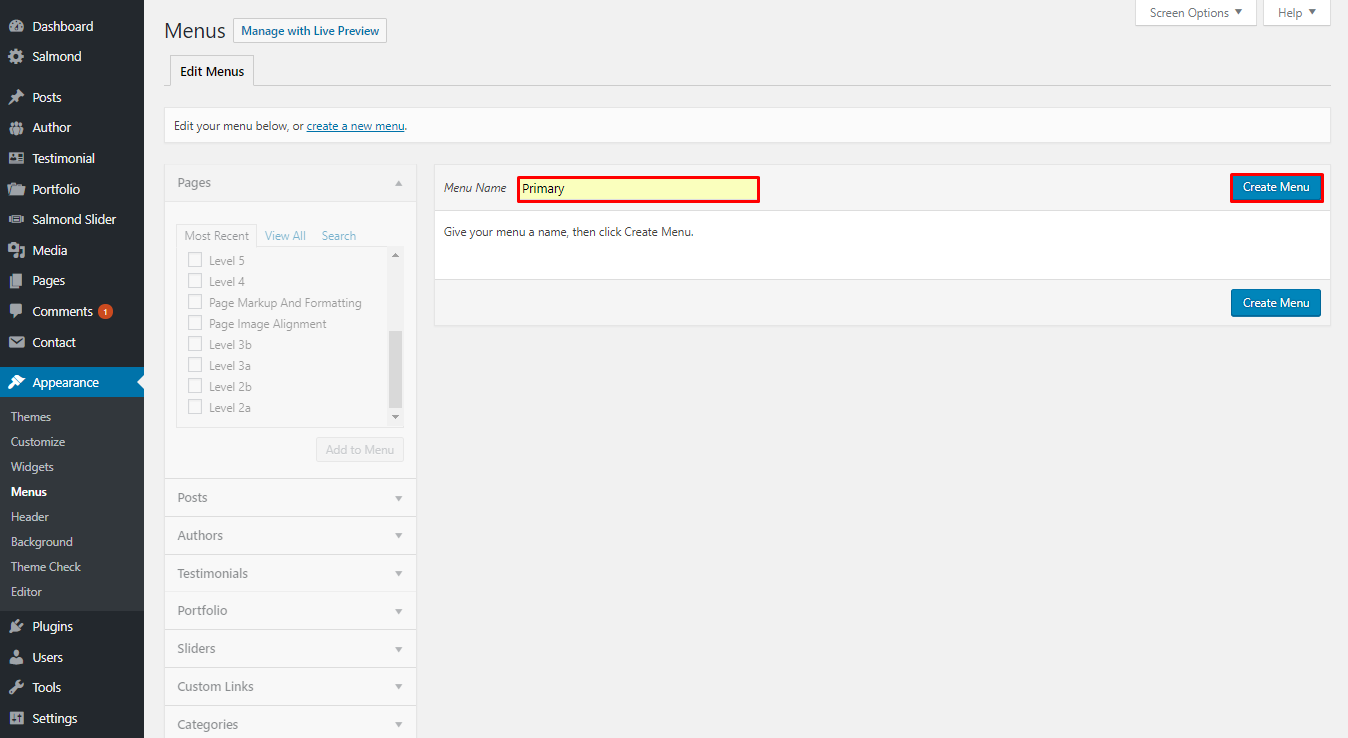
Step 02:
Add some item on the newly created menu

Step 03:
At last, Select a display location and Save the menu and You successfully created menu!
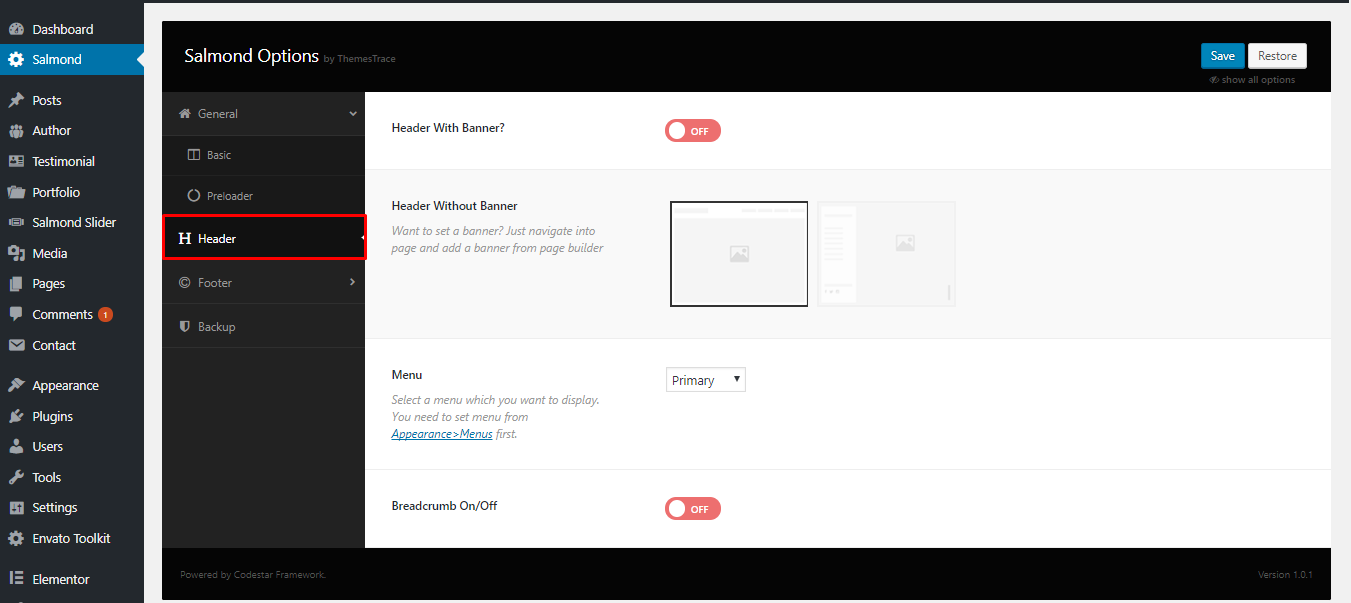
Header
To select the different types of header to navigate to Persoh menu from WordPress Dashboard. Then select Header
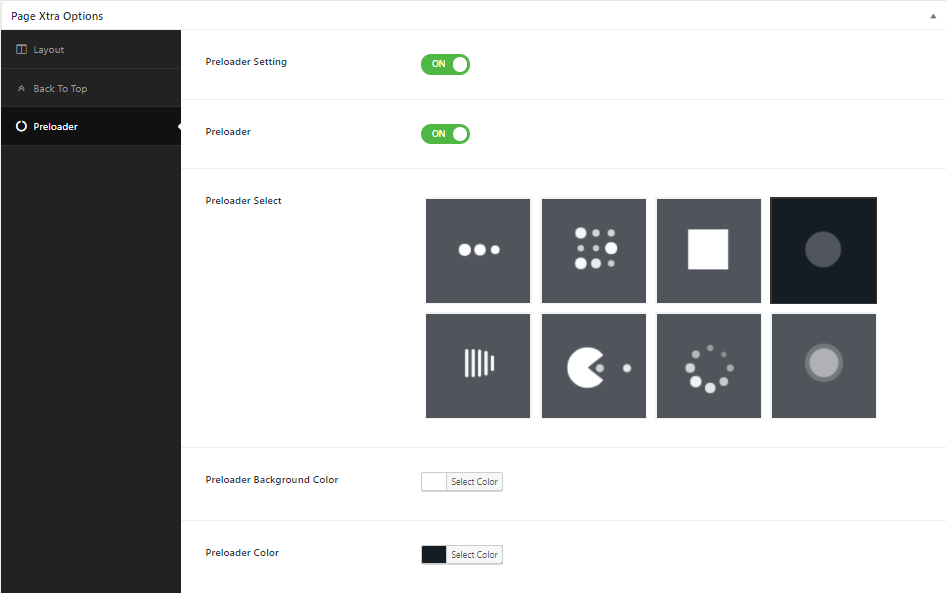
Preloader
To select different types of preloader, Navigate to Persoh menu from WordPress Dashboard. Then select General > Preloader
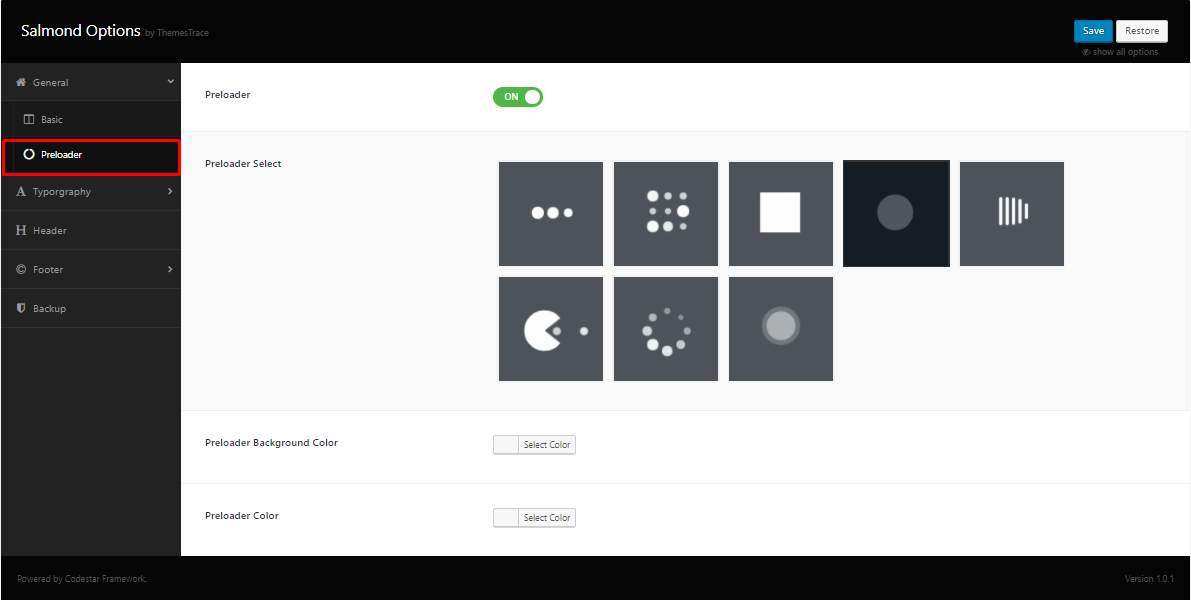
- You can switch on/off for the preloader.
- If you turn off the switcher, preloader will be disabled. If you turn on the swithcer preloader will be on fire and also you will find three extra options for dealing with preloader
- The first one is for preloader selection. You have the power to select different types of preloader.
- The second one is for preloader background color
- And the last one is for preloader color
- You can also turn on preloader from page to page.
- To turn on page preloader select any page and go to the bottom to find page preloader options. Make sure Codestar Plugin is installed to find the option
- You will find some options like below screenshot
Tips: If you turn on the page preloader, Theme Option preloader will be disabled for this specific page.
Front Page Setup
After installation and activating Persoh Theme, if you want to set up a Home page that is not a blog page. Then please follow this steps:
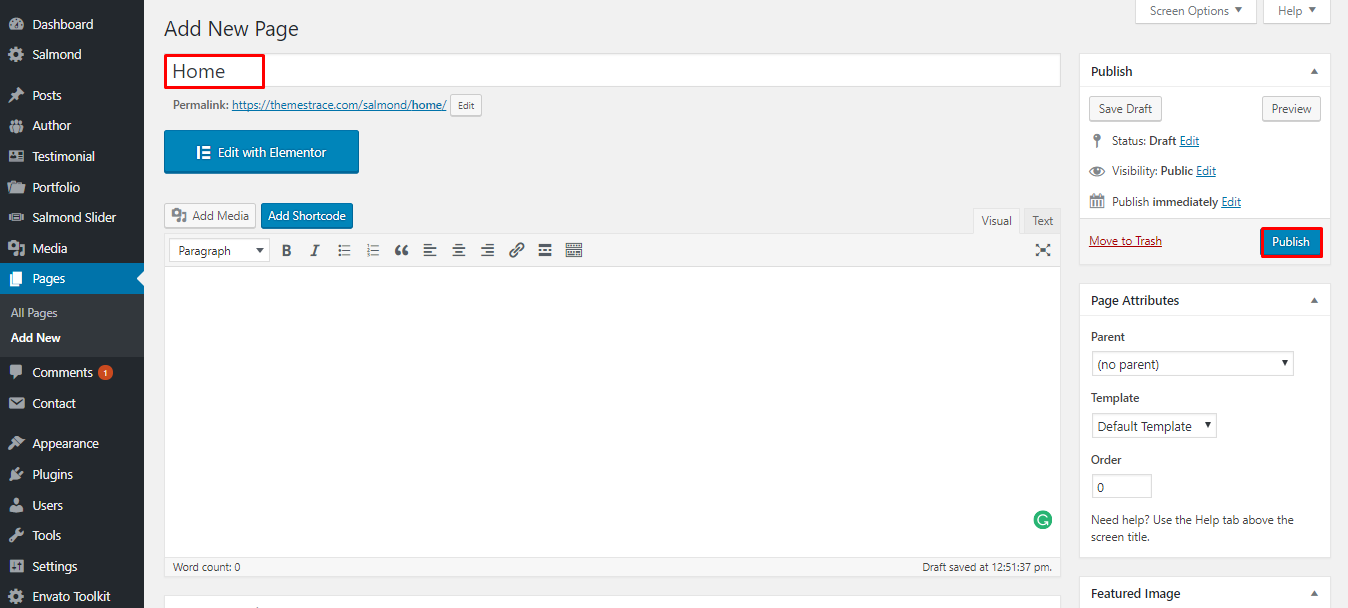
Step 01:
- Go to Dashboard and click on Pages
- Now click on Add new
- Write a title of your page into Title field like Home
- Now click on thePublish button.
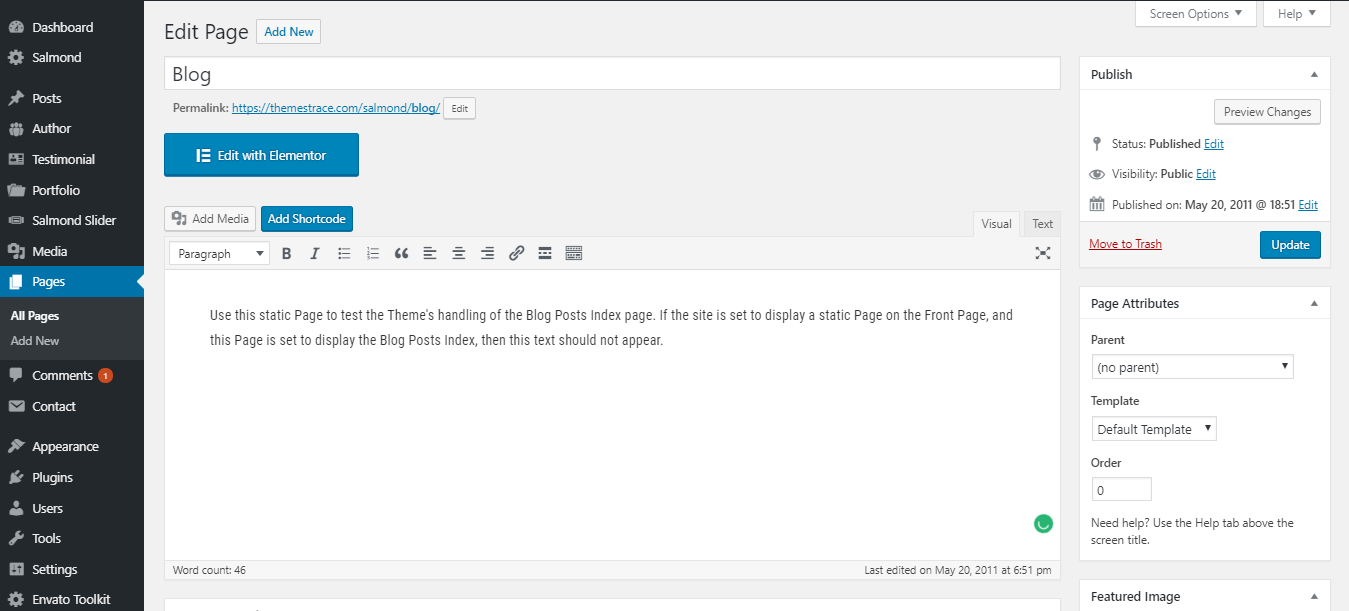
Step 02:
- Go to Dashboard and click on Pages
- Now click on Add new
- Write a title of your page into Title field like Blog
- Now click on the Publish button.
Now go to Dashboard and click on Settings > Reading. Please see the screenshot below and do like it.
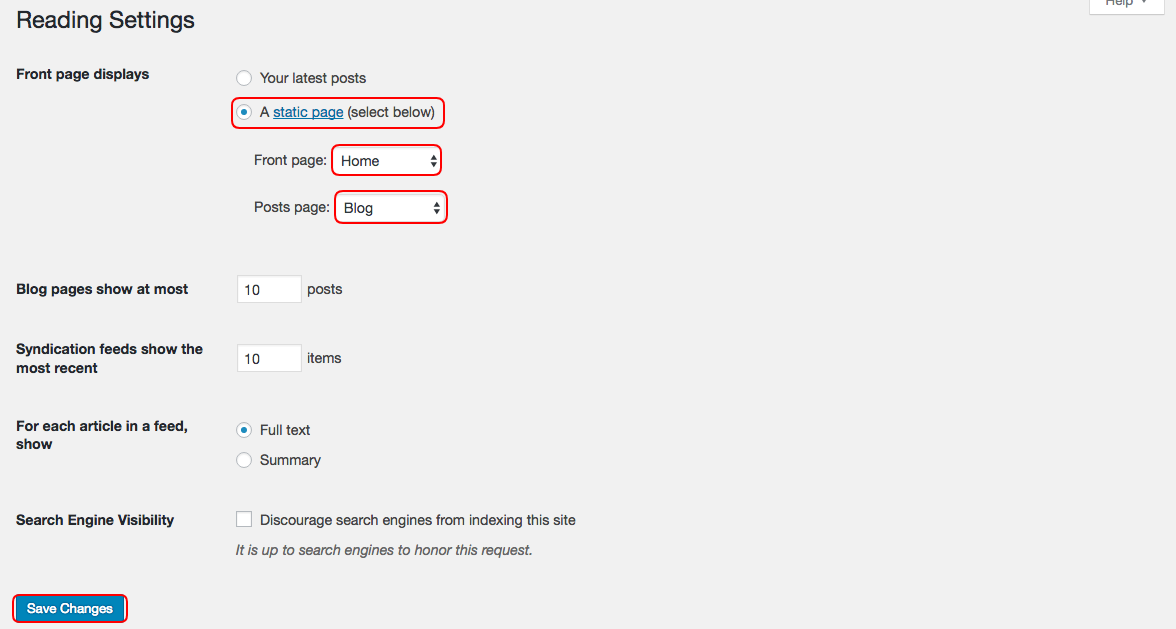
You have made a custom front page!
Portfolio Post Type
After installation and activating Persoh Theme, if you want to create Portfolio post then please follow this steps:
- Go to Dashboard and click on Portfolio
- Now click on Add new
- Write a title in Title field
- Write portfolio details in textarea
- Add portfolio category and tags
- Add portfolio image
- You can also set the portfolio external image link. If you set portfolio external link then default link will be disabled
- You can set portfolio target link. If you set Self then it will be open in the current window or If you set Blank then it will open a new window
- You can also set the portfolio image dimension. There are four predefined dimensions value are available.
- At last, click on the Publish button.
Thank You
Thanks Once Again Being With ThemesTrace. If You Find Any Issue Please Contact Us In themestracehelp@gmail.com